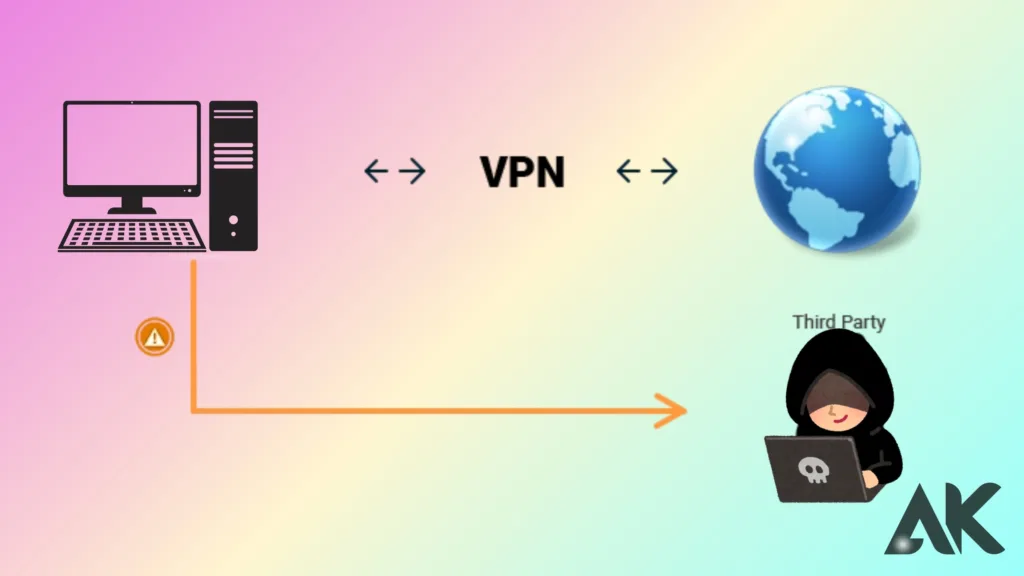
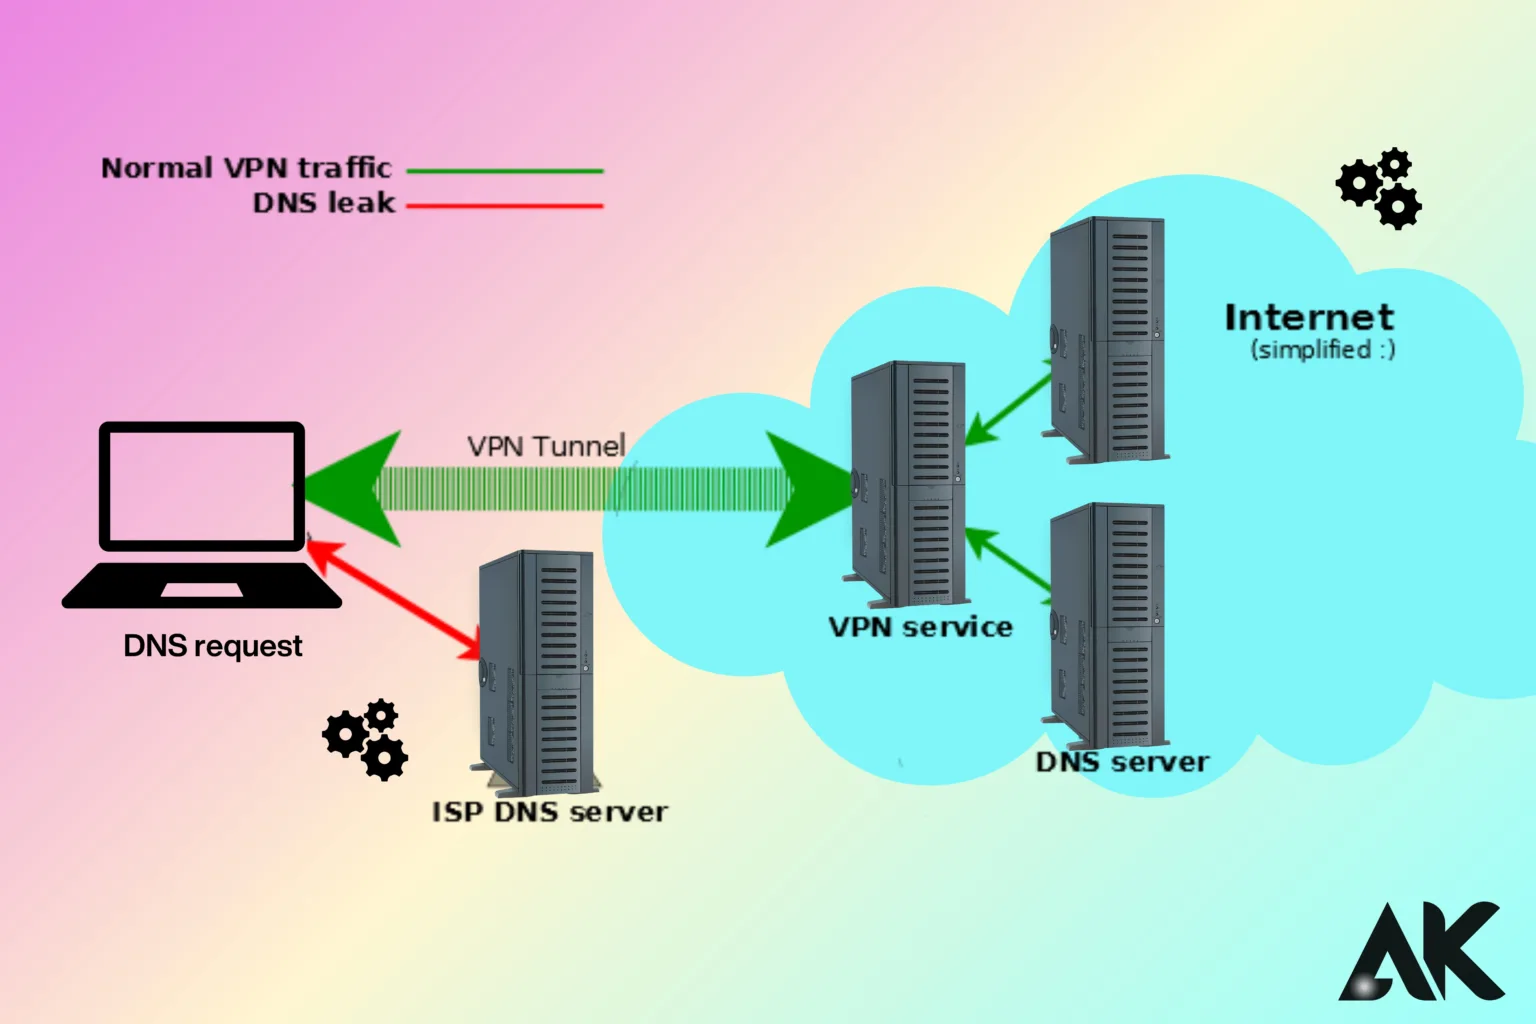
How to fix VPN DNS leaks One serious privacy issue that might defeat the whole point of utilizing a VPN is a DNS leak. Virtual private networks (VPNs) build a safe, encrypted tunnel for your internet traffic by hiding your IP address and guaranteeing the privacy of your online activity. In the event of a DNS breach, your Internet Service Provider (ISP) receives your DNS requests directly, bypassing the VPN tunnel. Even though you think you’re safe, this gives third parties access to your browsing history and maybe private information.
DNS leaks can occur for several reasons, such as incorrect VPN setups, inconsistencies with system preferences, or operating system flaws in your device. Covert surveillance is harmful because users are unaware that their online activities are being monitored. Resolving VPN DNS leaks is crucial for both protecting your privacy and guaranteeing the dependability of your VPN service. To give you complete control over your online privacy, we’ll go over the reasons for DNS leaks, how to spot them, and practical solutions to stop and avoid them.
How to Detect VPN DNS Leaks

Finding a VPN DNS leak is the first step to fixing it. Tools such as DNS leak testing websites can help you determine if your DNS requests are vulnerable. By examining the DNS servers that your internet traffic is passing through, these websites check your network for DNS leaks. If the servers listed in the results connect to your ISP instead of the VPN provider, your VPN is leaking DNS requests. This implies that even if you use a VPN, your ISP may still be able to view your surfing behaviour.
Examining your operating system’s DNS settings is one way to manually look for VPN DNS leaks. You can compare the DNS server addresses provided by your VPN provider with those displayed in your network settings. Any disparity indicates a leak. It is essential to perform these tests regularly to make sure your VPN is operating properly and shielding your private information from prying eyes.
Solutions to Fix VPN DNS Leaks

Fixing VPN Fixing DNS leaks often begins with correctly configuring your VPN client. Most reliable VPN providers include built-in DNS leak protection, which forces your DNS queries to go through their encrypted servers. To enable this feature, go to the settings menu of your VPN application and activate the DNS leak protection option. By taking this simple step, you can secure the routing of all DNS requests and prevent leaks caused by default ISP settings.
Another effective way to prevent VPN DNS leaks is by using custom DNS servers. Instead of relying on ISP-provided servers, switch to private or secure public DNS services like Google DNS or OpenDNS. Configure these servers manually in your operating system or router settings for added security. This method complements your VPN’s protection, creating a multi-layered defense against leaks.
Adjusting System Settings to Prevent DNS Leaks

Sometimes, the operating system of your devices is the problem. For example, unsupported IPv6 traffic can bypass your VPN. Consider turning off IPv6 on your device to address VPN DNS leaks. Usually, you may accomplish this by adjusting the settings on your network adapter. Although it might sound extreme, turning off IPv6 is a sensible way to make sure that no unencrypted traffic gets beyond your VPN connection.
Regularly deleting your DNS cache is another system-level fix. VPN DNS leaks can result from cached DNS entries that keep out-of-date or inaccurate settings. Emptying the cache removes any conflicts, allowing your VPN to securely route traffic. Despite being technical, these changes are very effective in protecting your privacy.
Choose a Reliable VPN Provider
Using an untrusted provider might raise the danger of VPN DNS breaches, and not all VPNs are made equal. Select a VPN service that has a solid track record for performance, security, and privacy. Dedicated DNS servers, strong leak protection features, and round-the-clock customer service to quickly resolve problems are common features of premium VPNs. You can save time and aggravation by looking into and choosing a service that places a high priority on leak prevention.
Keep your VPN software updated at all times as well. Updates are often released by VPN companies to fix bugs and enhance leak protection. Your system is vulnerable to possible leaks if you ignore these updates. Maintaining your connection’s security requires keeping up with your VPN’s features and updates.
Best Practices to Avoid VPN DNS Leaks in the Future
For the purpose to guarantee long-term security, preventing VPN DNS leaks involves more than just resolving problems as they occur. Frequent VPN software updates are among the finest practices. Updates frequently contain improved efficiency, improvements to DNS leak protection tools, and fixes for identified holes. Keeping your software updated reduces the likelihood of problems like VPN DNS leaks. Likewise, use online DNS leak testing tools to check your connection for leaks on a regular basis. These tests are easy to use, cost nothing, and can assist you in spotting issues before they reveal private information. Maintaining a proactive approach with regular tests guarantees that your VPN will continue to function as intended without endangering your data.
Another crucial habit is to configure your device for maximum security. If your VPN does not support IPv6, start by turning off all unused protocols. This can unintentionally result in VPN DNS leaks. Another efficient way is to set up your router or operating system to utilize custom DNS servers.
Even if your VPN momentarily fails, secure DNS solutions like OpenDNS or Cloudflare can serve as a backup security measure. Additionally, think about configuring a kill switch, which is a feature found in the majority of trustworthy VPNs and disconnects your internet access if the VPN connection fails. These steps provide a robust defence against DNS leaks and other vulnerabilities, especially when paired with a careful approach to VPN maintenance.
The Importance of Using a Kill Switch
A kill switch is an essential part that greatly lowers the possibility of VPN DNS leaks. A built-in kill switch automatically disconnects your internet connection if your VPN connection suddenly breaks. If this capability isn’t available, your device may fall back to utilizing the DNS servers that your ISP has set up by default, which would expose your DNS requests and negate the benefit of using a VPN. By turning on the kill switch, you can make sure that no traffic leaves the encrypted tunnel, protecting your privacy even when there are disruptions. Most premium VPN providers offer this functionality, but you may need to manually enable it in the app’s settings.
A kill switch not only guards against VPN DNS leaks but also guards against other possible weaknesses. When your VPN disconnects, it may reveal your actual IP address and location, leaving you vulnerable to monitoring or tracking. By preventing any internet activity until the VPN connection restores, a kill switch eliminates this risk. Because unexpected disconnections are more often when using public Wi-Fi networks, this extra security measure is very important. A kill switch serves as a safety measure, ensuring your privacy remains protected even in the event of unforeseen network issues.
Regularly Reviewing and Testing Your VPN Configuration
Regular configuration attention is required to keep a VPN connection safe and leak-free. VPN DNS leaks may occur as a result of operating system updates, modifications to your network environment, or even new ISP regulations. Regularly configure your VPN settings for privacy to prevent this. Ensure the operation of features such as the kill switch, correct setup of custom DNS servers, and activation of DNS leak prevention. These settings are your first defence and should always follow the latest security guidelines.
Another crucial element in preserving your security is to perform routine DNS leak tests. You can use a variety of free web applications to verify whether your VPN is safely routing your DNS queries. After making major changes to your operating system, network gear, or VPN, do these tests. Early detection of VPN DNS breaches allows you to promptly address issues and prevent any compromise of private information. This proactive strategy not only increases the efficacy of your VPN but also guarantees the long-term preservation of your online privacy.
Conclusion
One of the most important steps in maintaining your online security and privacy is fixing VPN DNS leaks. These leaks have the potential to covertly undermine the efficacy of your VPN, giving your ISP or malevolent third parties access to private browsing information. Understanding the root causes, such as obsolete software, incorrect setups, or system-level vulnerabilities, will help you take specific action to prevent and address them. You can achieve a strong defence against leaks by implementing techniques such as turning on DNS leak protection, setting up custom DNS servers, turning off IPv6, and utilizing a kill switch.
In addition, maintaining your VPN software up to date and being proactive with routine DNS leak tests guarantees that your connection will always be safe. Recall that managing and maintaining your VPN’s settings is just as important to its efficacy as the service itself. You can trust your VPN to protect your privacy by adhering to best practices and exercising caution. This will guarantee a safer and more secure online experience free from the dangers of VPN DNS leaks.
FAQs
Q1: What is a DNS leak in a VPN?
A VPN DNS leak occurs when your DNS queries reach your ISP’s DNS servers directly, bypassing the encrypted VPN tunnel. This jeopardizes your online privacy and reveals your surfing activities even if you are using a VPN.
Q2: How can we detect a VPN DNS leak?
Using online DNS leak testing tools, you can find a VPN DNS leak. These programs scrutinize your connection to ascertain whether your DNS requests reach your ISP or travel through the servers of your VPN. If the test reveals the DNS servers of your ISP, your VPN is compromised.
Q3: What causes a VPN DNS leak?
Inadequate VPN setup, out-of-date VPN software, problems with system settings (such as IPv6 or DNS caching), or shaky VPN services that don’t secure DNS requests are common causes of VPN DNS leaks.

