
Is your Vivo smartphone still connected to a VPN, causing slow internet or restricted access? The good news is that removing it is quick and easy!
In this guide, we’ll show you how to remove a VPN from Vivo smartphone in just three simple steps. Whether you installed it manually or through an app, we’ll walk you through disabling, uninstalling, and clearing any leftover files. Your Vivo phone will be rid of VPN at the end, allowing for quicker speeds and regular surfing again. Let’s begin!
Why Remove a VPN from Your Vivo Smartphone?
In addition to protecting your privacy, a virtual private network, or VPN, enables you to access material that is blocked on Vivo smartphones. But occasionally, you might want to take it off:
- Slow Internet Speeds – VPNs can reduce your browsing speed.
- Connection Issues – Some apps and websites may block VPN users.
- Battery Drain – Running a VPN in the background consumes power.
- Limited Access to Local Content – Some services work only with your real IP address.
If you’re facing any of these problems, removing the VPN from your Vivo smartphone is a good idea.
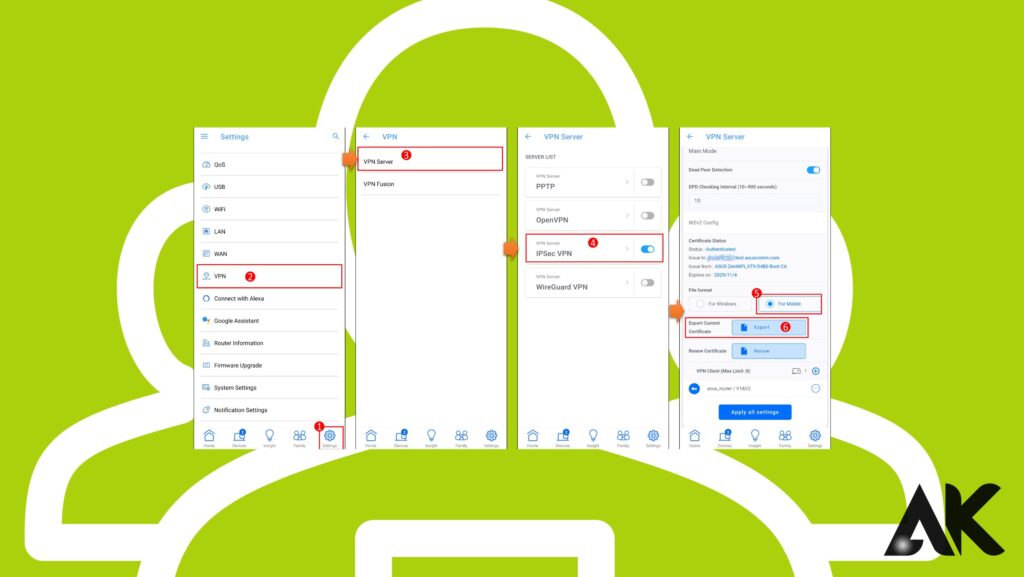
Disable the VPN from Settings
The easiest way to remove a VPN from Vivo smartphone is by disabling it from How to remove a VPN from Vivo smartphone the settings. This method ensures your internet connection returns to normal without uninstalling any apps. Simply go to Settings > Network & Internet > VPN, then tap on the active VPN connection and select “Disconnect” or “Turn Off.”
Disable the “Always-on VPN” option if the VPN keeps reconnecting. This step explains how to uninstall a VPN from a Vivo smartphone so that you may access prohibited local content, speed up your internet, and resolve connectivity problems. For a long-term fix, you might need to fully delete the VPN program if turning it off doesn’t work.
Open the Settings App
- Unlock your Vivo smartphone.
- Go to Settings from the home screen or app drawer.
Navigate to VPN Settings
- Scroll down and select “More settings” or “Network & Internet.”
- Tap VPN to see all active connections.
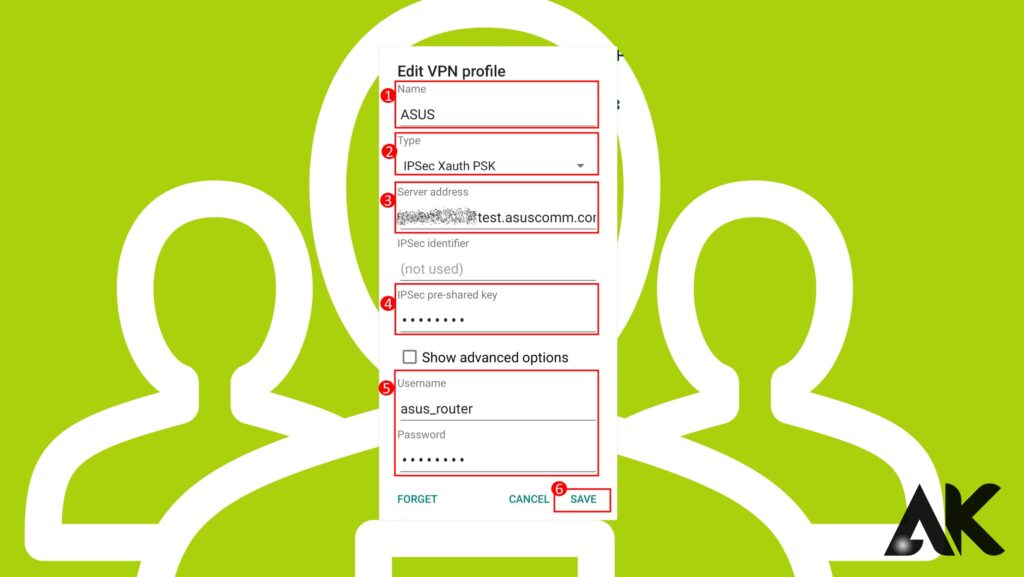
Disconnect and Delete the VPN
- Tap on the active VPN connection you want to remove.
- Click “Forget” or “Delete” to remove it permanently.
Uninstall Any VPN Apps
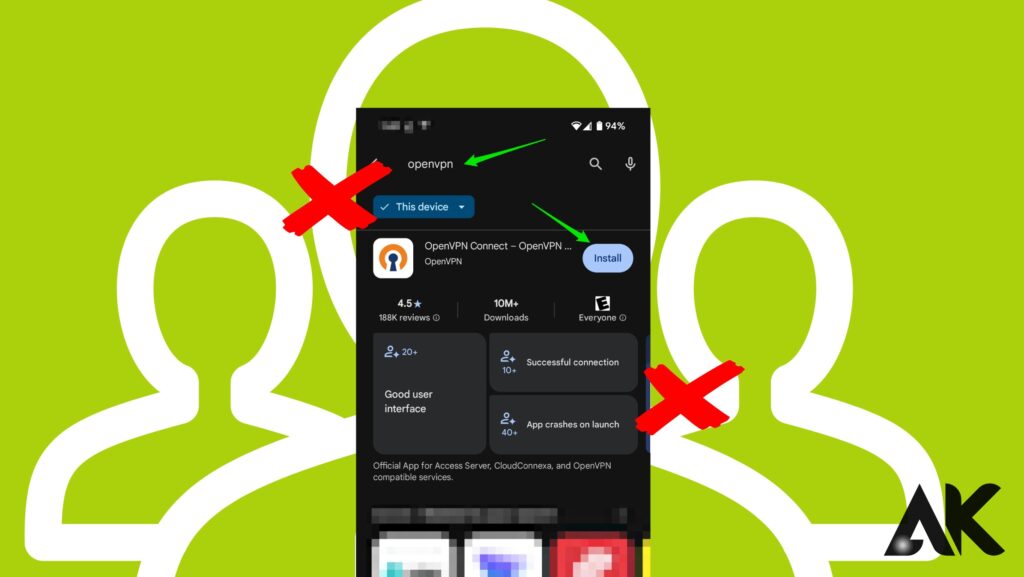
Uninstalling the VPN software is the next step in removing a VPN from a Vivo smartphone if turning it off doesn’t work. The Google Play Store is a good place to install and uninstall a lot of VPNs. Locate the “How to remove a VPN from Vivo smartphone VPN app” under Settings > Apps & Notifications > Installed Apps, then select “Uninstall.”
This will remove the VPN and stop it from running in the background. If the app refuses to uninstall, check Device Admin Apps under security settings and disable its permissions. Once How to remove a VPN from Vivo smartphone uninstalled, restart your Vivo smartphone to ensure all VPN traces are gone.
How to Uninstall a VPN App:
- Find the VPN App
- Open the Settings app.
- Go to “Apps & Notifications” or “Installed Apps.”
- Uninstall the App
- Scroll down and tap the VPN app.
- Click “Uninstall” and confirm the action.
Remove VPN Configuration Files
After uninstalling the VPN app, you may still need to delete leftover configuration files. A crucial step in how to remove a VPN from Vivo smartphone is clearing these files to prevent automatic reconnections. Open the File Manager and navigate to Android > Data or Download folders.
Look for any files related to your VPN provider, such as “ExpressVPN” or “NordVPN,” and delete them. Alternatively, using a cleanup app like CCleaner can help remove hidden VPN files. This ensures your Vivo smartphone is completely free of VPN settings, restoring normal network functionality without any interference.
Using File Manager:
- Open File Manager on your Vivo smartphone.
- Navigate to “Android > Data” or “Download” folders.
- Look for any folders related to your VPN provider (e.g., “NordVPN,” “ExpressVPN”).
- Delete them permanently.
Using a Cleanup App:
- Alternatively, you can use CCleaner or any junk cleaner app to remove leftover VPN files.
Troubleshooting: What If You Can’t Remove the VPN?
If you’re struggling with how to remove a VPN from Vivo smartphone, there are a few troubleshooting steps to try. First, restart your device and attempt to disable the VPN again. If it still won’t turn off, check Device Admin Apps under Settings > Security and remove the VPN’s permissions.
You can also reset Network Settings under System > Reset Options to clear all VPN configurations. If the VPN app persists, boot your Vivo smartphone into Safe Mode and uninstall it from there. These steps ensure complete removal, restoring normal internet access and preventing automatic VPN reconnections.
Restart Your Vivo Smartphone
- Press and hold the Power Button and tap Restart.
- Try removing the VPN again after restarting.
Disable Device Admin Access
Some VPN apps require device admin permission, making them harder to remove.
- Go to Settings > Security > Device Admin Apps and disable the VPN’s access.
- Now, try uninstalling the VPN again.
Reset Network Settings
If you’re still facing issues, resetting network settings can help.
- Open Settings > System > Reset Options.
- Select “Reset Wi-Fi, Mobile & Bluetooth.”
- This will remove all network-related settings, including VPNs.
Conclusion
That’s it! Now you know how to remove a VPN from Vivo smartphone in just three easy steps. Whether you disabled it from settings, uninstalled an app, or removed leftover files, your Vivo phone should now be VPN-free!
FAQs
1. Can I turn off a VPN instead of removing it?
Yes! You can disable the VPN by going to Settings > VPN and switching it off without uninstalling it.
2. Will removing a VPN affect my phone’s security?
A VPN helps protect your privacy, but removing it won’t harm your device unless you rely on it for secure browsing.
3. What if I installed a VPN through a profile?
Go to Settings > Profiles & Device Management and delete the VPN profile manually.