
Want to protect your online privacy on Windows 11? The best way to stay secure is by using a VPN (Virtual Private Network). If you’re wondering how to set up VPN on Windows 11, don’t worry—it’s easier than you think! A VPN encrypts your internet traffic, hides your IP address, and allows you to access restricted content safely. In this guide, we’ll walk you through five simple steps to set up a VPN on Windows 11, whether you prefer manual configuration or a dedicated VPN app. Let’s get started!
Why Use a VPN on Windows 11?
Before we dive into the setup process, here’s why using a VPN is essential:
- Enhanced Privacy – A VPN hides your real IP address from hackers and government surveillance.
- Secure Public Wi-Fi – Protects your data when using public Wi-Fi at airports, cafes, or hotels.
- Access Restricted Content – Bypass geo-blocks to watch Netflix, Hulu, or BBC iPlayer from anywhere.
- Safe Online Banking – Prevents cybercriminals from stealing sensitive information like passwords.
Choose a Reliable VPN Provider
Choosing the right VPN provider is the first step in how to set up VPN on Windows 11. A reliable VPN ensures strong encryption, fast speeds, and a strict no-logs policy to protect your privacy. Paid VPNs like ExpressVPN, NordVPN, and Surfshark offer the best security and performance, while free VPNs may have limitations like slower speeds and data restrictions.
When selecting a VPN, look for features like AES-256 encryption, How to set up VPN on Windows 11 multiple server locations, and a kill switch. A good VPN provider guarantees a safe and seamless online experience, making your Windows 11 VPN setup more secure and efficient.
Before setting up a VPN on Windows 11, you need a VPN service. There are two types of VPNs:
- Paid VPNs (Best for Security & Speed) – Services like ExpressVPN, NordVPN, and Surfshark offer fast speeds, strong encryption, and no data limits.
- Free VPNs (Limited Features) – Free VPNs like ProtonVPN work but may have slower speeds and data restrictions.
👉 Tip: Always choose a VPN with strong encryption (AES-256), a no-logs policy, and multiple server locations.
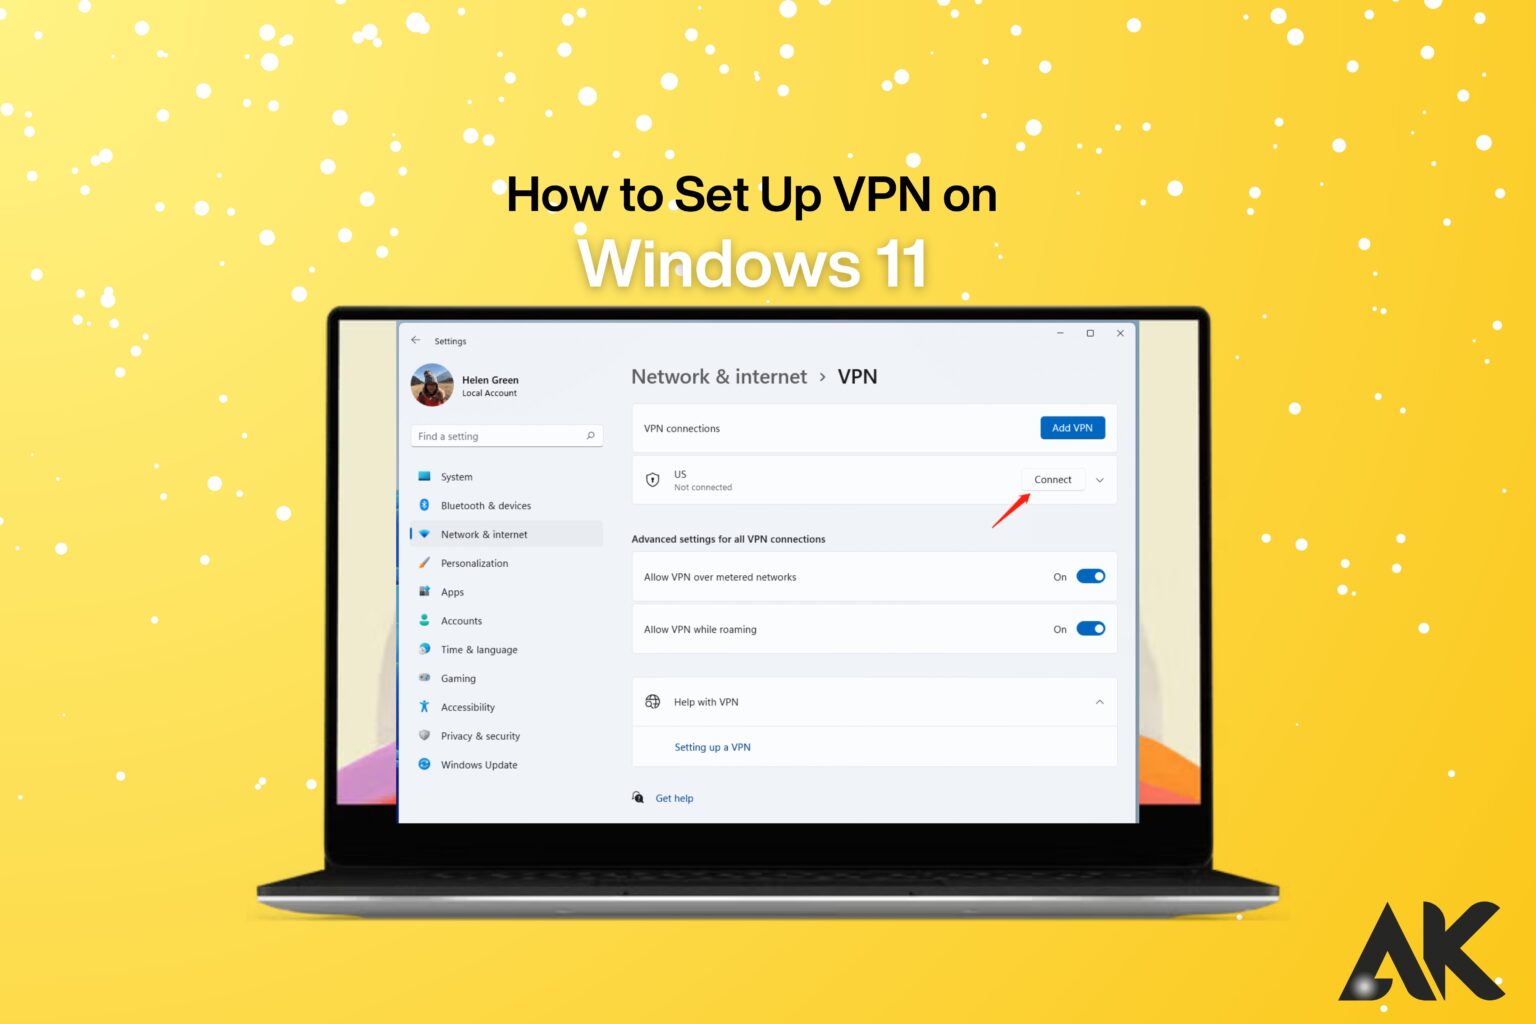
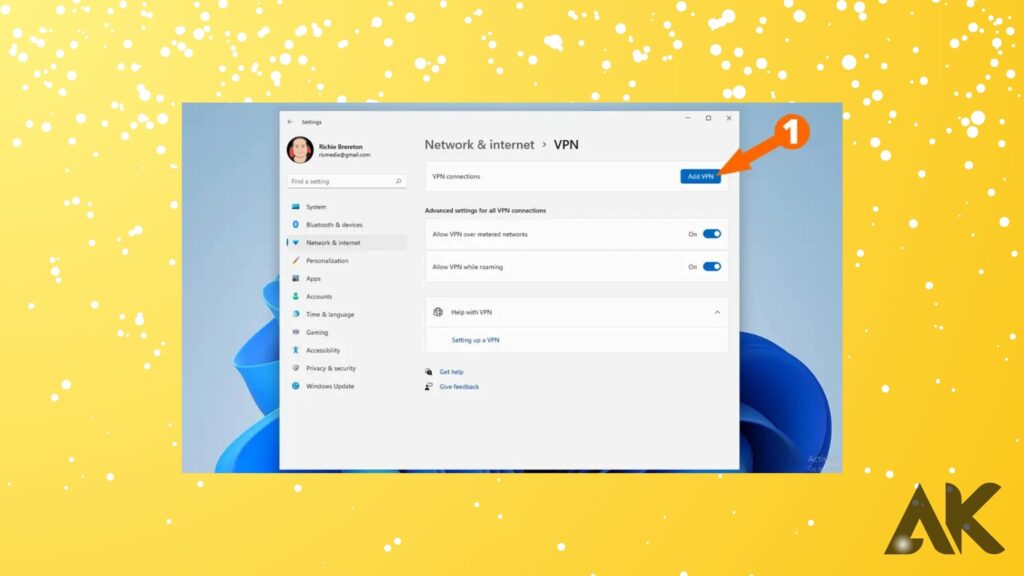
Add a VPN Connection in Windows 11
Adding a VPN connection is a crucial step in how to set up VPN on Windows 11. To do this, open Settings, navigate to Network & Internet, and select VPN. Click Add VPN, then enter details like the VPN provider, server address, and authentication type.
Choose Windows (built-in) as the provider and select the correct VPN protocol (such as L2TP/IPsec or IKEv2). After saving, click Connect to establish a secure connection. This manual setup is useful for those who prefer built-in Windows features instead of How to set up VPN on Windows 11 third-party apps, ensuring a stable and private browsing experience on Windows 11.
Open VPN Settings
- Click Start and go to Settings.
- Select Network & internet, then click VPN.
- Click Add VPN.
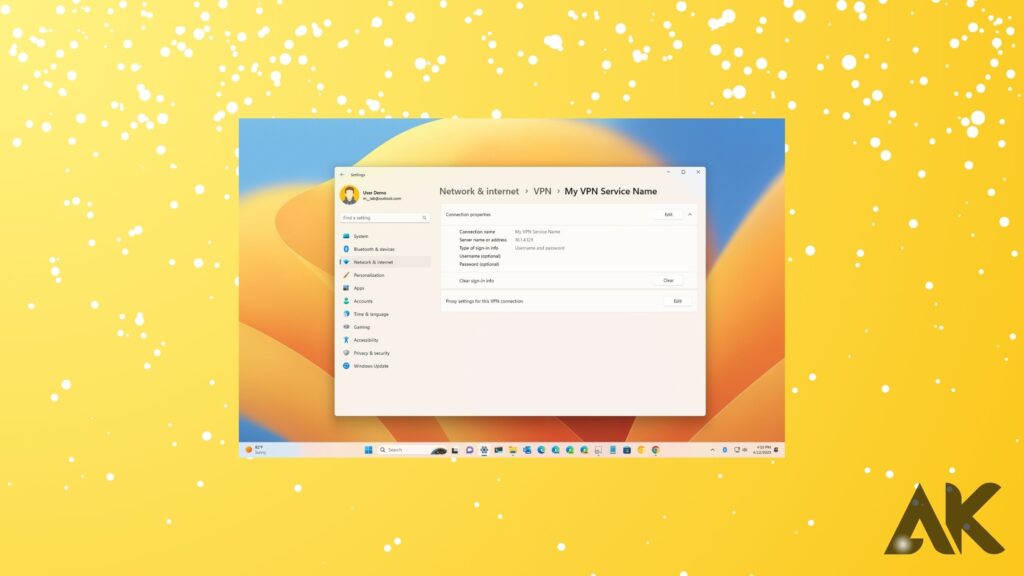
Enter VPN Details
You’ll need to fill in the following fields:
- VPN Provider → Choose Windows (built-in).
- Connection Name → Enter a name for your VPN (e.g., “My Secure VPN”).
- Server Name or Address → Copy and paste your VPN server address (provided by your VPN provider).
- VPN Type → Select Automatic (or choose a specific protocol like L2TP/IPsec if required).
- Type of Sign-in Info → Select Username and password or Certificate (based on your VPN service).
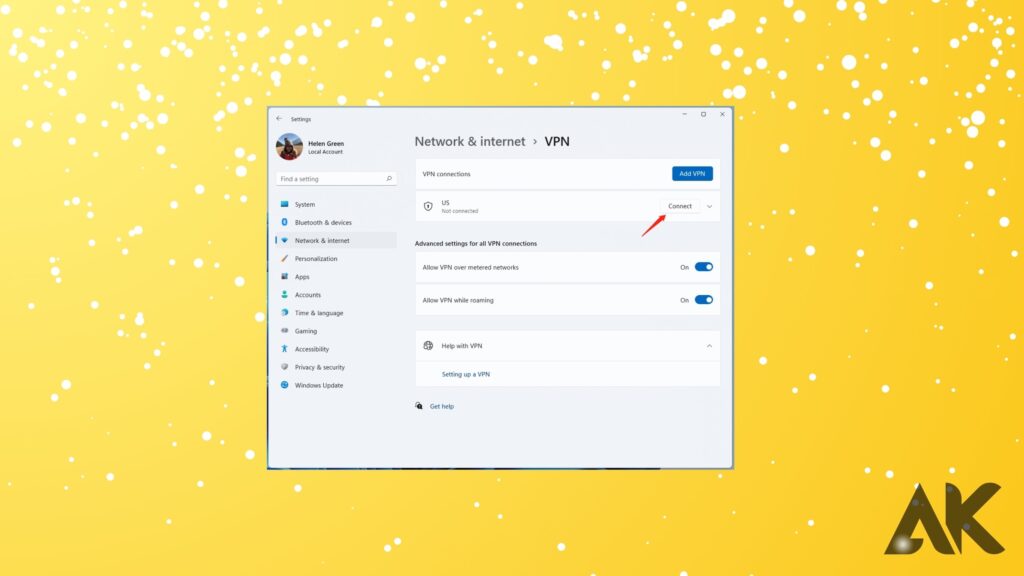
Save & Connect
- Click Save.
- Select the VPN connection and click Connect.
Install & Configure a VPN App (Recommended)
Installing a VPN app is the easiest method in how to set up VPN on Windows 11. Most premium VPN providers, like ExpressVPN, NordVPN, and Surfshark, offer dedicated Windows apps that simplify the setup process. First, download the VPN app from the provider’s official website, install it, and log in with your credentials.
Then, choose a server location and click Connect How to set up VPN on Windows 11 to establish a secure connection. This method is recommended because it offers advanced features like automatic kill switch, split tunneling, and optimized servers. Using a VPN app ensures better security, faster speeds, and an effortless VPN experience on Windows 11.
Download the VPN App
- Go to the official website of your VPN provider.
- Download the Windows 11 version of the VPN app.
- Install the app by following the on-screen instructions.
Log In & Select a Server
- Open the VPN app and enter your login details.
- Choose a VPN server location (e.g., the US for Netflix US).
- Click Connect to establish a secure VPN connection.
Configure Advanced VPN Settings (Optional)
Configuring advanced settings is an important step in how to set up VPN on Windows 11 for better security and performance. You can enable the Kill Switch feature to prevent data leaks if the VPN disconnects unexpectedly. Adjusting the VPN protocol to WireGuard or OpenVPN can improve speed and encryption.
Using Split Tunneling allows you to choose which apps use the How to set up VPN on Windows 11 while others run on a regular connection. These settings help customize your VPN experience, ensuring a secure, fast, and reliable connection on Windows 11. Fine-tuning these options enhances both privacy and browsing efficiency.
Enable Kill Switch
- A Kill Switch disconnects the internet if your VPN drops, preventing data leaks.
- Some VPN apps have a built-in Kill Switch feature—turn it on in the settings.
Change VPN Protocol
- Windows 11 supports L2TP/IPsec, PPTP, and IKEv2 protocols.
- In your VPN app, switch to WireGuard or OpenVPN for better speed and security.
Use Split Tunneling
- Allows you to choose which apps use the VPN while others use a regular connection.
- Useful for streaming Netflix while keeping other apps on your local internet.
Test Your VPN Connection
Testing your VPN connection is the final step in how to set up VPN on Windows 11 to ensure it’s working correctly. Start by checking your IP address on websites like WhatIsMyIP.com to confirm that your real location is hidden. Next, run a DNS leak test to ensure your internet requests are secure.
Additionally, perform a speed test to check if your VPN is affecting performance. If you notice slow speeds or leaks, try switching servers or adjusting VPN settings. Regular testing guarantees privacy, security, and a smooth browsing experience while How to set up VPN on Windows 11.
Check IP Address
- Visit WhatIsMyIP.com.
- If your IP address matches the VPN server’s location, your VPN is working.
Run a DNS Leak Test
- Go to DNSLeakTest.com.
- If your real location is hidden, the VPN is secure.
Speed Test
- Use Speedtest.net to check if the VPN is slowing down your internet.
- Switch to a different server if needed for better performance.
Troubleshooting: Fix VPN Connection Issues
If your VPN isn’t working, try these quick fixes:
- Restart Your Computer – Simple but effective.
- Check VPN Credentials – Ensure your username and password are correct.
- Change VPN Server – Some servers may be overloaded.
- Disable Firewall or Antivirus – Some security programs block VPNs.
- Reinstall the VPN App – Delete and reinstall for a fresh start.
Conclusion
Setting up a VPN on Windows 11 is essential for enhancing online security, privacy, and accessibility. By following these five simple steps, you can easily configure a How to set up VPN on Windows 11 manually or through a dedicated app. Regularly testing your connection ensures optimal performance and protection. Now that you know how to set up VPN on Windows 11, you can browse the internet safely, access geo-restricted content, and keep your personal data secure. Stay safe online!
FAQs
1. Can I set up a free VPN on Windows 11?
Yes, you can set up a free VPN on Windows 11, but free VPNs often come with limitations like data caps, slower speeds, and fewer server options. For better security and performance, a paid VPN is recommended.
2. Do I need a VPN app to use a VPN on Windows 11?
No, you can manually configure a VPN in Windows Settings How to set up VPN on Windows 11 without an app. However, using a VPN app simplifies the process and provides extra features like kill switch and optimized servers.
3. Why is my VPN not connecting on Windows 11?
If your VPN isn’t connecting, try switching servers, changing protocols, or restarting your device. Also, check if your firewall or antivirus is blocking the VPN connection.